Creating a Gantt chart in MS Project 2010 can seem like a daunting task, especially if you're new to project management or haven't used the software before. But don't worry, with these simple steps, you'll be creating professional-looking Gantt charts in no time. A Gantt chart is a type of bar chart that illustrates a project schedule, making it easy to visualize and track progress. In this post, we'll walk you through the process of making a Gantt chart in MS Project 2010, from setting up your project to customizing your chart.
1. Setting Up Your Project
To start creating your Gantt chart, you'll need to set up your project in MS Project 2010. This involves creating a new project, setting the project start date, and configuring the project calendar. To do this, open MS Project 2010 and click on "File" > "New" to create a new project. Then, enter your project information, such as the project name, start date, and finish date. You can also set up your project calendar by specifying the working days and hours.
2. Defining Tasks
Next, you'll need to define the tasks that make up your project. Tasks are the individual activities that need to be completed to deliver your project. To create a task, click on the "Task" tab in the ribbon and then click on the "Task" button in the "Tasks" group. Enter a task name, duration, and any relevant notes or resources. You can also create summary tasks to group related tasks together.
3. Creating a Task List
Once you've defined your tasks, you'll need to create a task list. A task list is a table that displays all the tasks in your project, along with their durations, start and finish dates, and resource assignments. To create a task list, click on the "View" tab in the ribbon and then click on the "Task Sheet" button in the "Data" group. This will display a table with all your tasks, which you can then use to create your Gantt chart.
4. Switching to Gantt Chart View
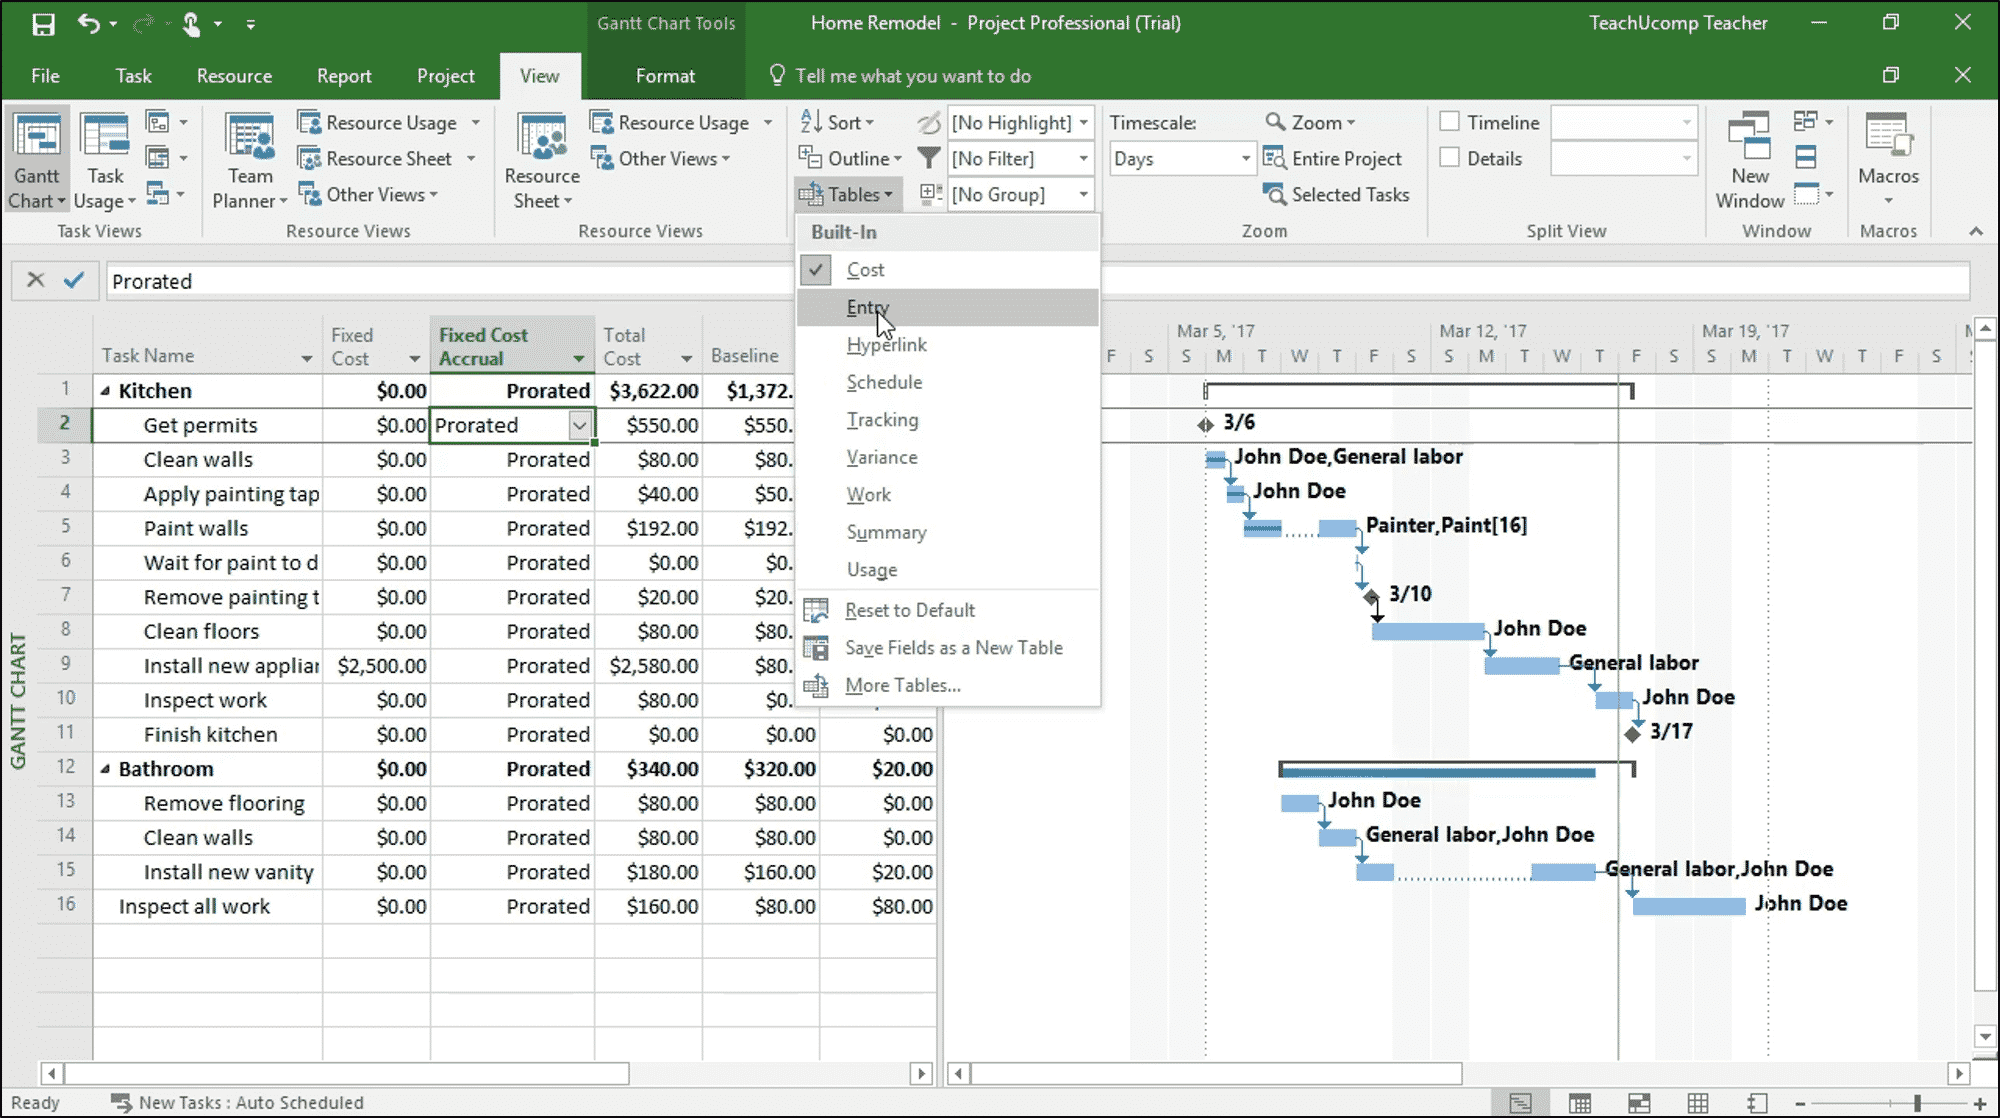
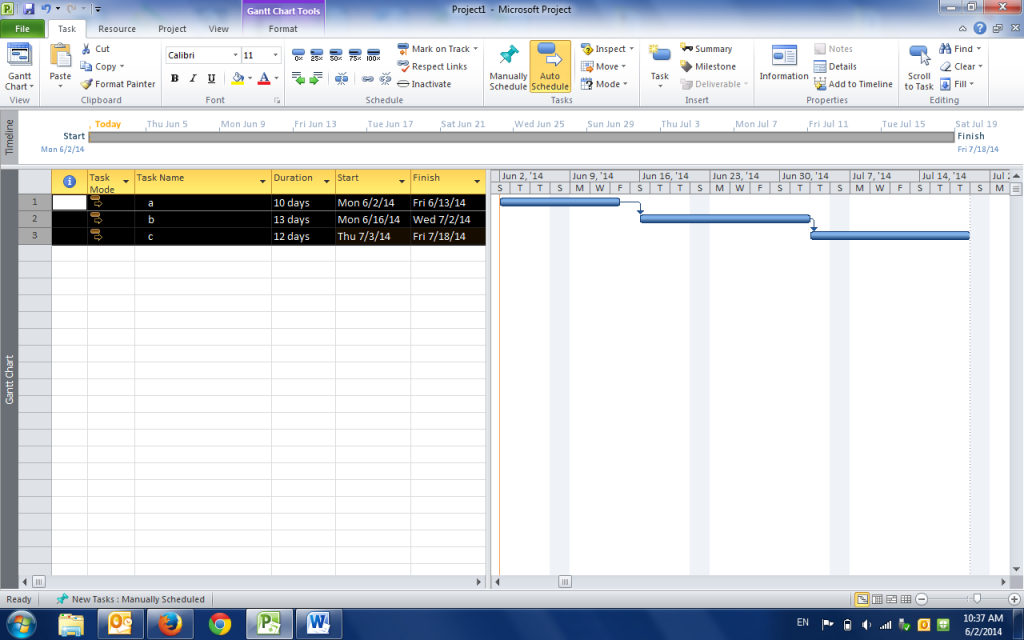
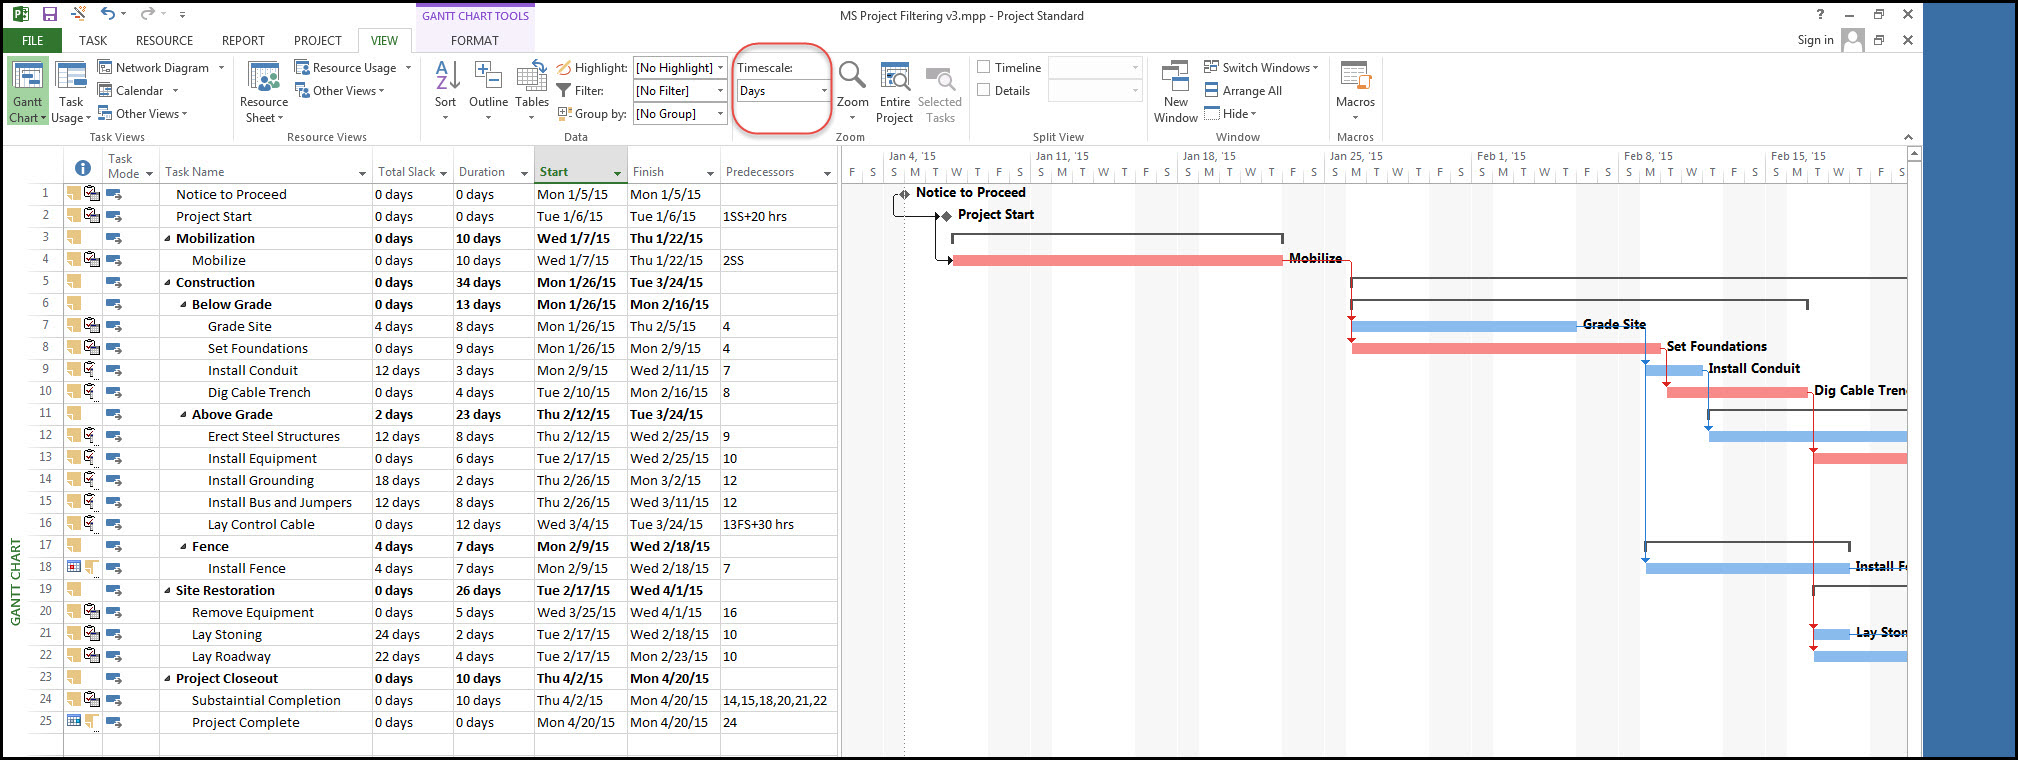
To create a Gantt chart, you'll need to switch to the Gantt Chart view. To do this, click on the "View" tab in the ribbon and then click on the "Gantt Chart" button in the "Task Views" group. This will display your task list in a Gantt chart format, with bars representing the duration of each task.
5. Customizing the Gantt Chart
Once you've created your Gantt chart, you can customize it to suit your needs. You can change the appearance of the chart by using the "Format" tab in the ribbon, which allows you to adjust the colors, fonts, and layout of the chart. You can also add gridlines, labels, and other elements to make the chart easier to read.
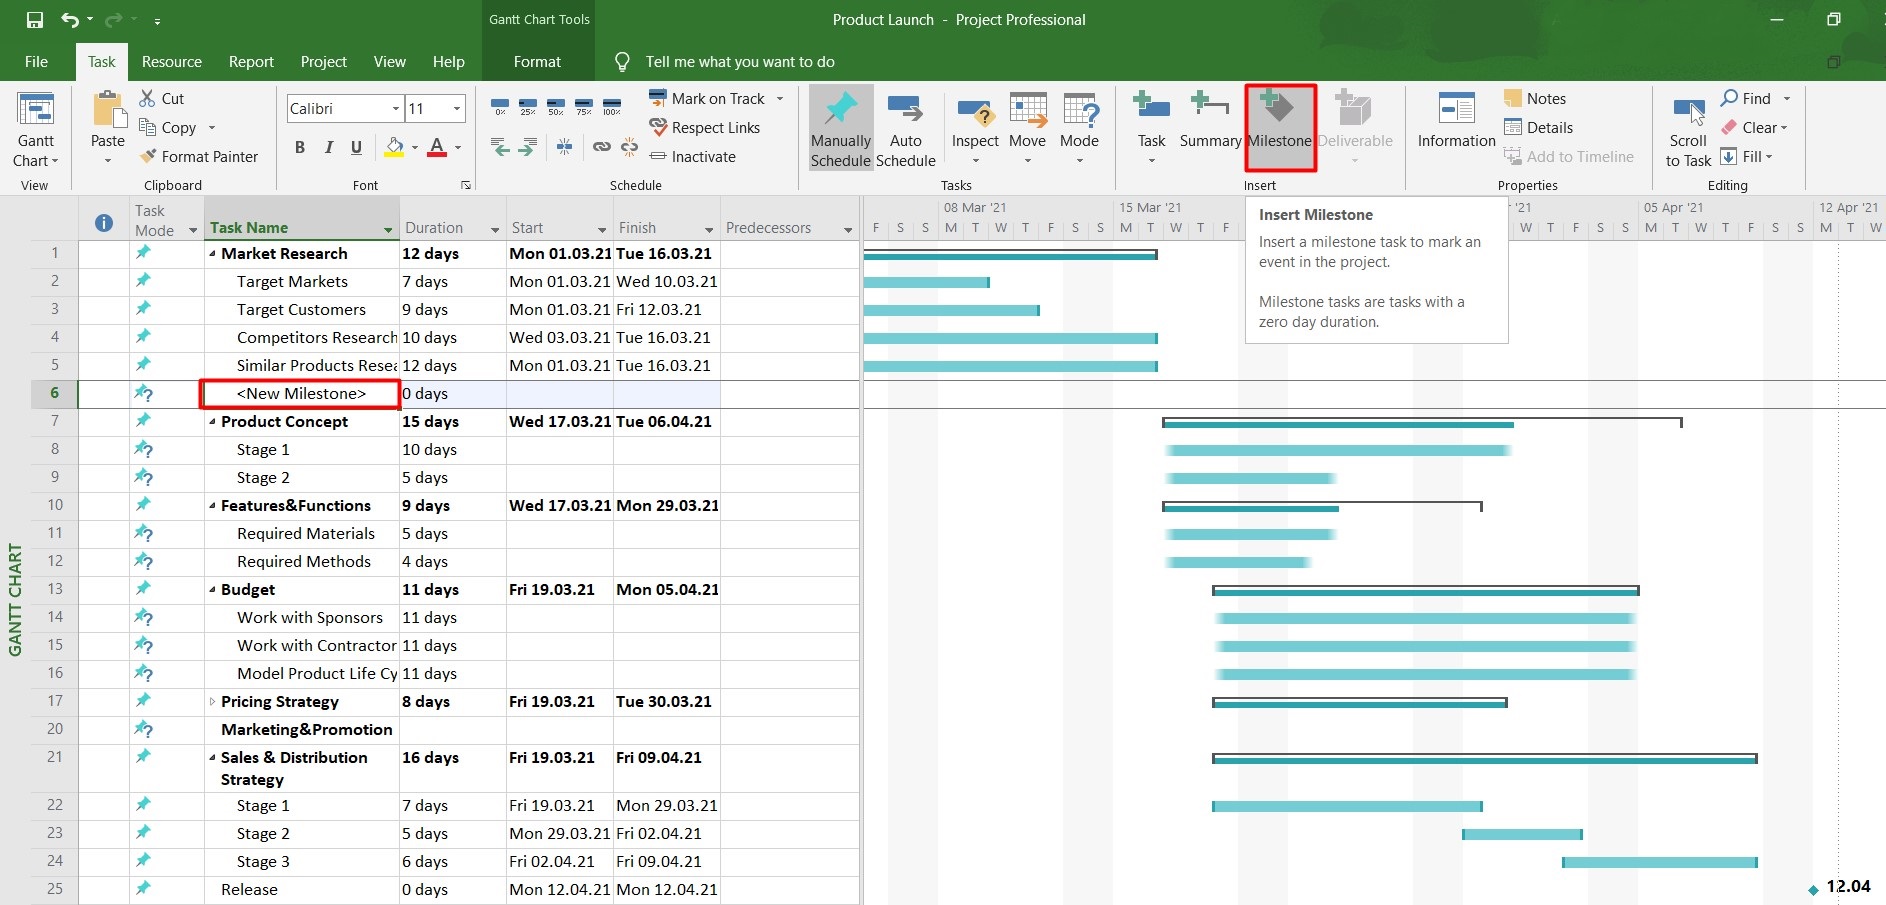
6. Adding Dependencies
To make your Gantt chart more realistic, you'll need to add dependencies between tasks. Dependencies represent the relationships between tasks, such as which tasks need to be completed before others can start. To add a dependency, select the two tasks that you want to link, and then click on the "Link Tasks" button in the "Task" group.
7. Assigning Resources
Another important step in creating a Gantt chart is assigning resources to tasks. Resources are the people, materials, and equipment needed to complete each task. To assign a resource, select the task and then click on the "Resource" tab in the ribbon. You can then assign a resource to the task, and specify the amount of work they'll be doing.
8. Tracking Progress
Finally, you can use your Gantt chart to track progress on your project. To do this, update the progress of each task by entering the actual start and finish dates, and the percentage complete. You can also use the "Tracking" tab in the ribbon to update the status of tasks and resources.
9. Printing and Sharing the Gantt Chart
Once you've created and updated your Gantt chart, you can print or share it with others. To print the chart, click on the "File" tab in the ribbon and then click on the "Print" button. You can also export the chart to other formats, such as PDF or Excel, or share it with others via email or online collaboration tools.
10. Reviewing and Revising the Gantt Chart
Finally, it's essential to regularly review and revise your Gantt chart to ensure it remains accurate and up-to-date. This involves checking for any changes to task durations, dependencies, or resource assignments, and updating the chart accordingly. By regularly reviewing and revising your Gantt chart, you can ensure that your project stays on track and that you deliver it on time, within budget, and to the required quality standards.
If you are searching about Microsoft Project 2010 Gantt Chart you've came to the right place. We have 10 Images about Microsoft Project 2010 Gantt Chart like Microsoft Project 2010 Gantt Chart, How To Make Gantt Chart With Microsoft Project - Infoupdate.org and also Microsoft Project 2010 Gantt Chart. Here it is:
Microsoft Project 2010 Gantt Chart
 fity.club
Microsoft Project 2010 Gantt Chart
Microsoft Project 2010 Gantt Chart
 fity.club
Microsoft Project 2010 Gantt Chart
Microsoft Project 2010 Gantt Chart
 fity.club
Microsoft Project 2010 Gantt Chart
How To Export Gantt Chart From MS-Project 2010 – Mohammed M. Alani
 www.mohammedalani.com
How to export Gantt chart from MS-Project 2010 – Mohammed M. Alani
Microsoft Project 2010 Gantt Chart
 fity.club
Microsoft Project 2010 Gantt Chart
How To Make Gantt Chart With Microsoft Project - Infoupdate.org
 infoupdate.org
How To Make Gantt Chart With Microsoft Project - Infoupdate.org
Ms Project Gantt Chart - Loasl
 loasl.weebly.com
Ms project gantt chart - loasl
Microsoft Project 2010 Gantt Chart
 fity.club
Microsoft Project 2010 Gantt Chart
Microsoft Project 2010 Gantt Chart
 fity.club
Microsoft Project 2010 Gantt Chart
Gantt Chart Ms Project
 fity.club
Gantt Chart Ms Project
gantt chart ms project. Microsoft project 2010 gantt chart. Microsoft project 2010 gantt chart

