Creating a pie chart in Adobe Illustrator can be a bit of a challenge, especially if you're new to the software. However, with the right steps and a bit of practice, you can create a professional-looking pie chart that's perfect for presenting data in a visually appealing way. In this article, we'll take you through the process of making a pie chart in Illustrator, from setting up your document to adding the final touches.
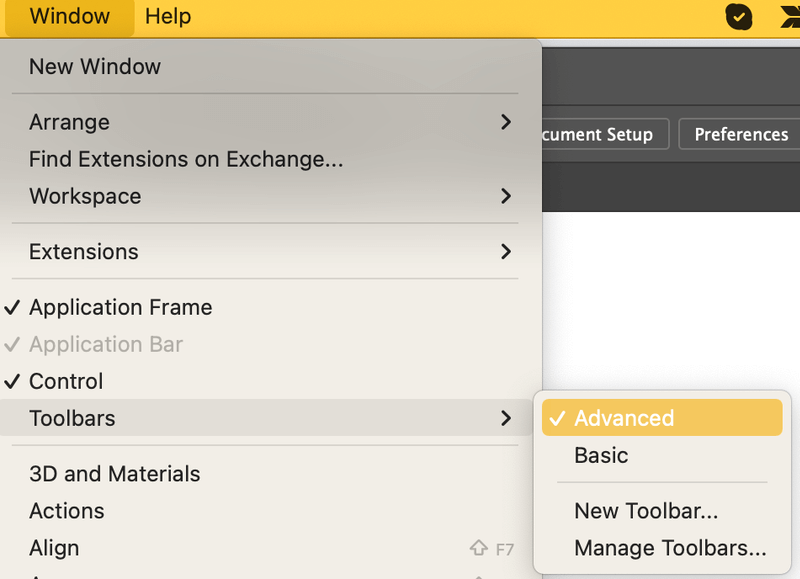
1. Setting Up Your Document
To start, open up Adobe Illustrator and create a new document. Choose the size and resolution that you want your pie chart to be, and make sure to set the color mode to RGB or CMYK, depending on how you plan to use the chart. You can also choose a template or preset to get started, but for a pie chart, it's usually best to start from scratch. Take a moment to familiarize yourself with the Illustrator interface, including the toolbar, menu, and panels.
2. Creating a New Layer
Next, create a new layer in your document by going to the Layer panel and clicking on the "Create New Layer" button. Name this layer "Pie Chart" or something similar, and make sure it's set to be visible and editable. This will help you keep your chart organized and make it easier to work on individual elements without affecting the rest of the document. You can also create additional layers for different parts of your chart, such as a layer for the chart itself and another for the labels.
3. Drawing the Pie Chart Circle
Now it's time to draw the circle that will form the basis of your pie chart. Use the Ellipse tool to draw a circle, holding down the Shift key to constrain the shape to a perfect circle. You can adjust the size and position of the circle to fit your needs, and use the Align panel to center it in your document. Make sure the circle is on the "Pie Chart" layer you created earlier, and use the Layers panel to lock or hide other layers as needed.
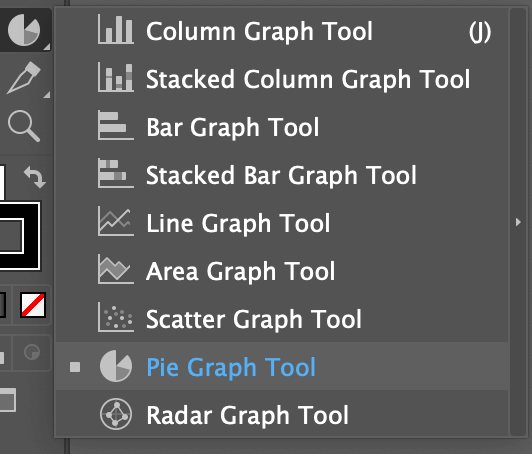
4. Dividing the Circle into Sections
To divide the circle into sections, use the Pie Graph tool, which can be found in the Graph tools submenu. This tool will allow you to specify the number of sections you want, as well as the size of each section. You can enter the data for each section manually, or import it from a spreadsheet or other data source. Make sure to adjust the settings to fit your data and the design of your chart.
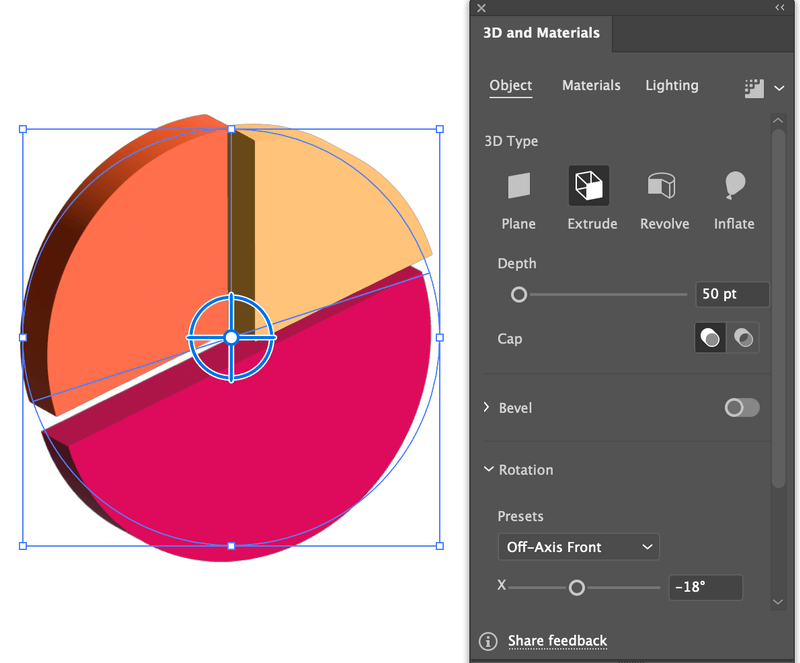
5. Customizing the Chart Appearance
Once you have your pie chart sections in place, you can start customizing the appearance of the chart. Use the Stroke and Fill panels to change the color and style of the sections, and add textures or patterns if desired. You can also add additional design elements, such as shapes or icons, to enhance the visual appeal of the chart. Don't be afraid to experiment with different colors and styles to find the look that works best for your data and audience.
6. Adding Labels and Annotations
To make your pie chart more readable and understandable, add labels and annotations to each section. Use the Type tool to create text objects, and use the Align panel to position them relative to the sections. You can also use the Transform panel to rotate or scale the text to fit the curved shape of the circle. Make sure the labels are clear and easy to read, and consider using a legend or key to explain the meaning of each section.
7. Adjusting the Chart Layout
As you work on your pie chart, you may need to adjust the layout to fit the size and shape of your document. Use the Arrange panel to move the chart and its elements around, and use the Align panel to ensure that everything is properly aligned. You can also use the Transform panel to resize or rotate the chart, or use the Crop tool to trim excess space around the edges.
8. Finalizing the Design
Once you're happy with the layout and appearance of your pie chart, it's time to finalize the design. Use the Layers panel to merge or flatten the layers, and use the Export panel to save the chart as a high-resolution image file. You can also use the Share panel to share the chart directly to social media or other online platforms. Take a moment to review the chart for any errors or inconsistencies, and make any final adjustments before sharing it with your audience.
9. Exporting the Chart
Finally, export your pie chart as a high-quality image file that can be used in presentations, reports, or other documents. Choose a file format that's suitable for your needs, such as PNG, JPEG, or SVG, and adjust the settings to optimize the image for web or print use. You can also use the Export panel to create a PDF or EPS file, which can be useful for sharing the chart with colleagues or clients.
10. Sharing Your Chart
With your pie chart complete, it's time to share it with the world! Use the Share panel to post the chart directly to social media, or save it to a cloud storage service like Dropbox or Google Drive. You can also embed the chart in a website or blog, or use it in a presentation or report. Whatever you choose, make sure to share your chart with others and enjoy the fruits of your labor – after all, creating a professional-looking pie chart is a significant accomplishment, and you should be proud of your hard work and dedication.
If you are looking for How to Make a Pie Chart in Adobe Illustrator (3 Styles) you've came to the right page. We have 10 Pictures about How to Make a Pie Chart in Adobe Illustrator (3 Styles) like How to Make a Pie Chart in Adobe Illustrator (3 Styles), How to Make a Pie Chart in Adobe Illustrator (3 Styles) and also How to Make a Pie Chart in Adobe Illustrator (3 Styles). Here you go:
How To Make A Pie Chart In Adobe Illustrator (3 Styles)
 illustratorhow.com
How to Make a Pie Chart in Adobe Illustrator (3 Styles)
How To Make A Pie Chart In Adobe Illustrator (3 Styles)
 illustratorhow.com
How to Make a Pie Chart in Adobe Illustrator (3 Styles)
How To Make A Pie Chart In Illustrator In 6 Simple Steps
 maschituts.com
How to Make a Pie Chart in Illustrator in 6 Simple Steps
How To Make A Pie Chart In Adobe Illustrator: 9 Steps
 www.wikihow.tech
How to Make a Pie Chart in Adobe Illustrator: 9 Steps
How To Make A Pie Chart In Adobe Illustrator (3 Styles)
 illustratorhow.com
How to Make a Pie Chart in Adobe Illustrator (3 Styles)
Make Pie Chart Illustrator How To Create Infographic Elements With
 fity.club
Make Pie Chart Illustrator How To Create Infographic Elements With
How To Make A Pie Chart In Adobe Illustrator (3 Styles)
 illustratorhow.com
How to Make a Pie Chart in Adobe Illustrator (3 Styles)
How To Make A Pie Chart In Adobe Illustrator (3 Styles)
 illustratorhow.com
How to Make a Pie Chart in Adobe Illustrator (3 Styles)
How To Make A Pie Chart In Adobe Illustrator (3 Styles)
 illustratorhow.com
How to Make a Pie Chart in Adobe Illustrator (3 Styles)
Make Pie Chart Illustrator
 fity.club
Make Pie Chart Illustrator
how to make a pie chart in adobe illustrator (3 styles). make pie chart illustrator how to create infographic elements with. How to make a pie chart in illustrator in 6 simple steps

