Creating a flowchart can be a straightforward process if you have the right steps to follow. Whether you're a student, a professional, or just someone looking to organize your thoughts, flowcharts can be incredibly helpful in visualizing processes, decisions, and outcomes. In this article, we'll guide you through the steps to make a flowchart, from defining your problem to sharing your finished chart.
1. Define the Problem or Process
Before you start making your flowchart, you need to clearly define the problem or process you want to illustrate. This could be anything from a simple decision-making process to a complex workflow. Take some time to think about what you're trying to accomplish with your flowchart and what steps are involved. Writing down your thoughts and brainstorming can help clarify your ideas and ensure you don't miss any important steps.
2. Identify the Key Steps and Decisions
Once you have a clear idea of the problem or process, it's time to break it down into individual steps and decisions. These will form the basis of your flowchart. Think about each step in the process and how it leads to the next one. Identify any decisions that need to be made and how they affect the outcome. This will help you create a clear and logical flowchart that's easy to follow.
3. Determine the Type of Flowchart You Need
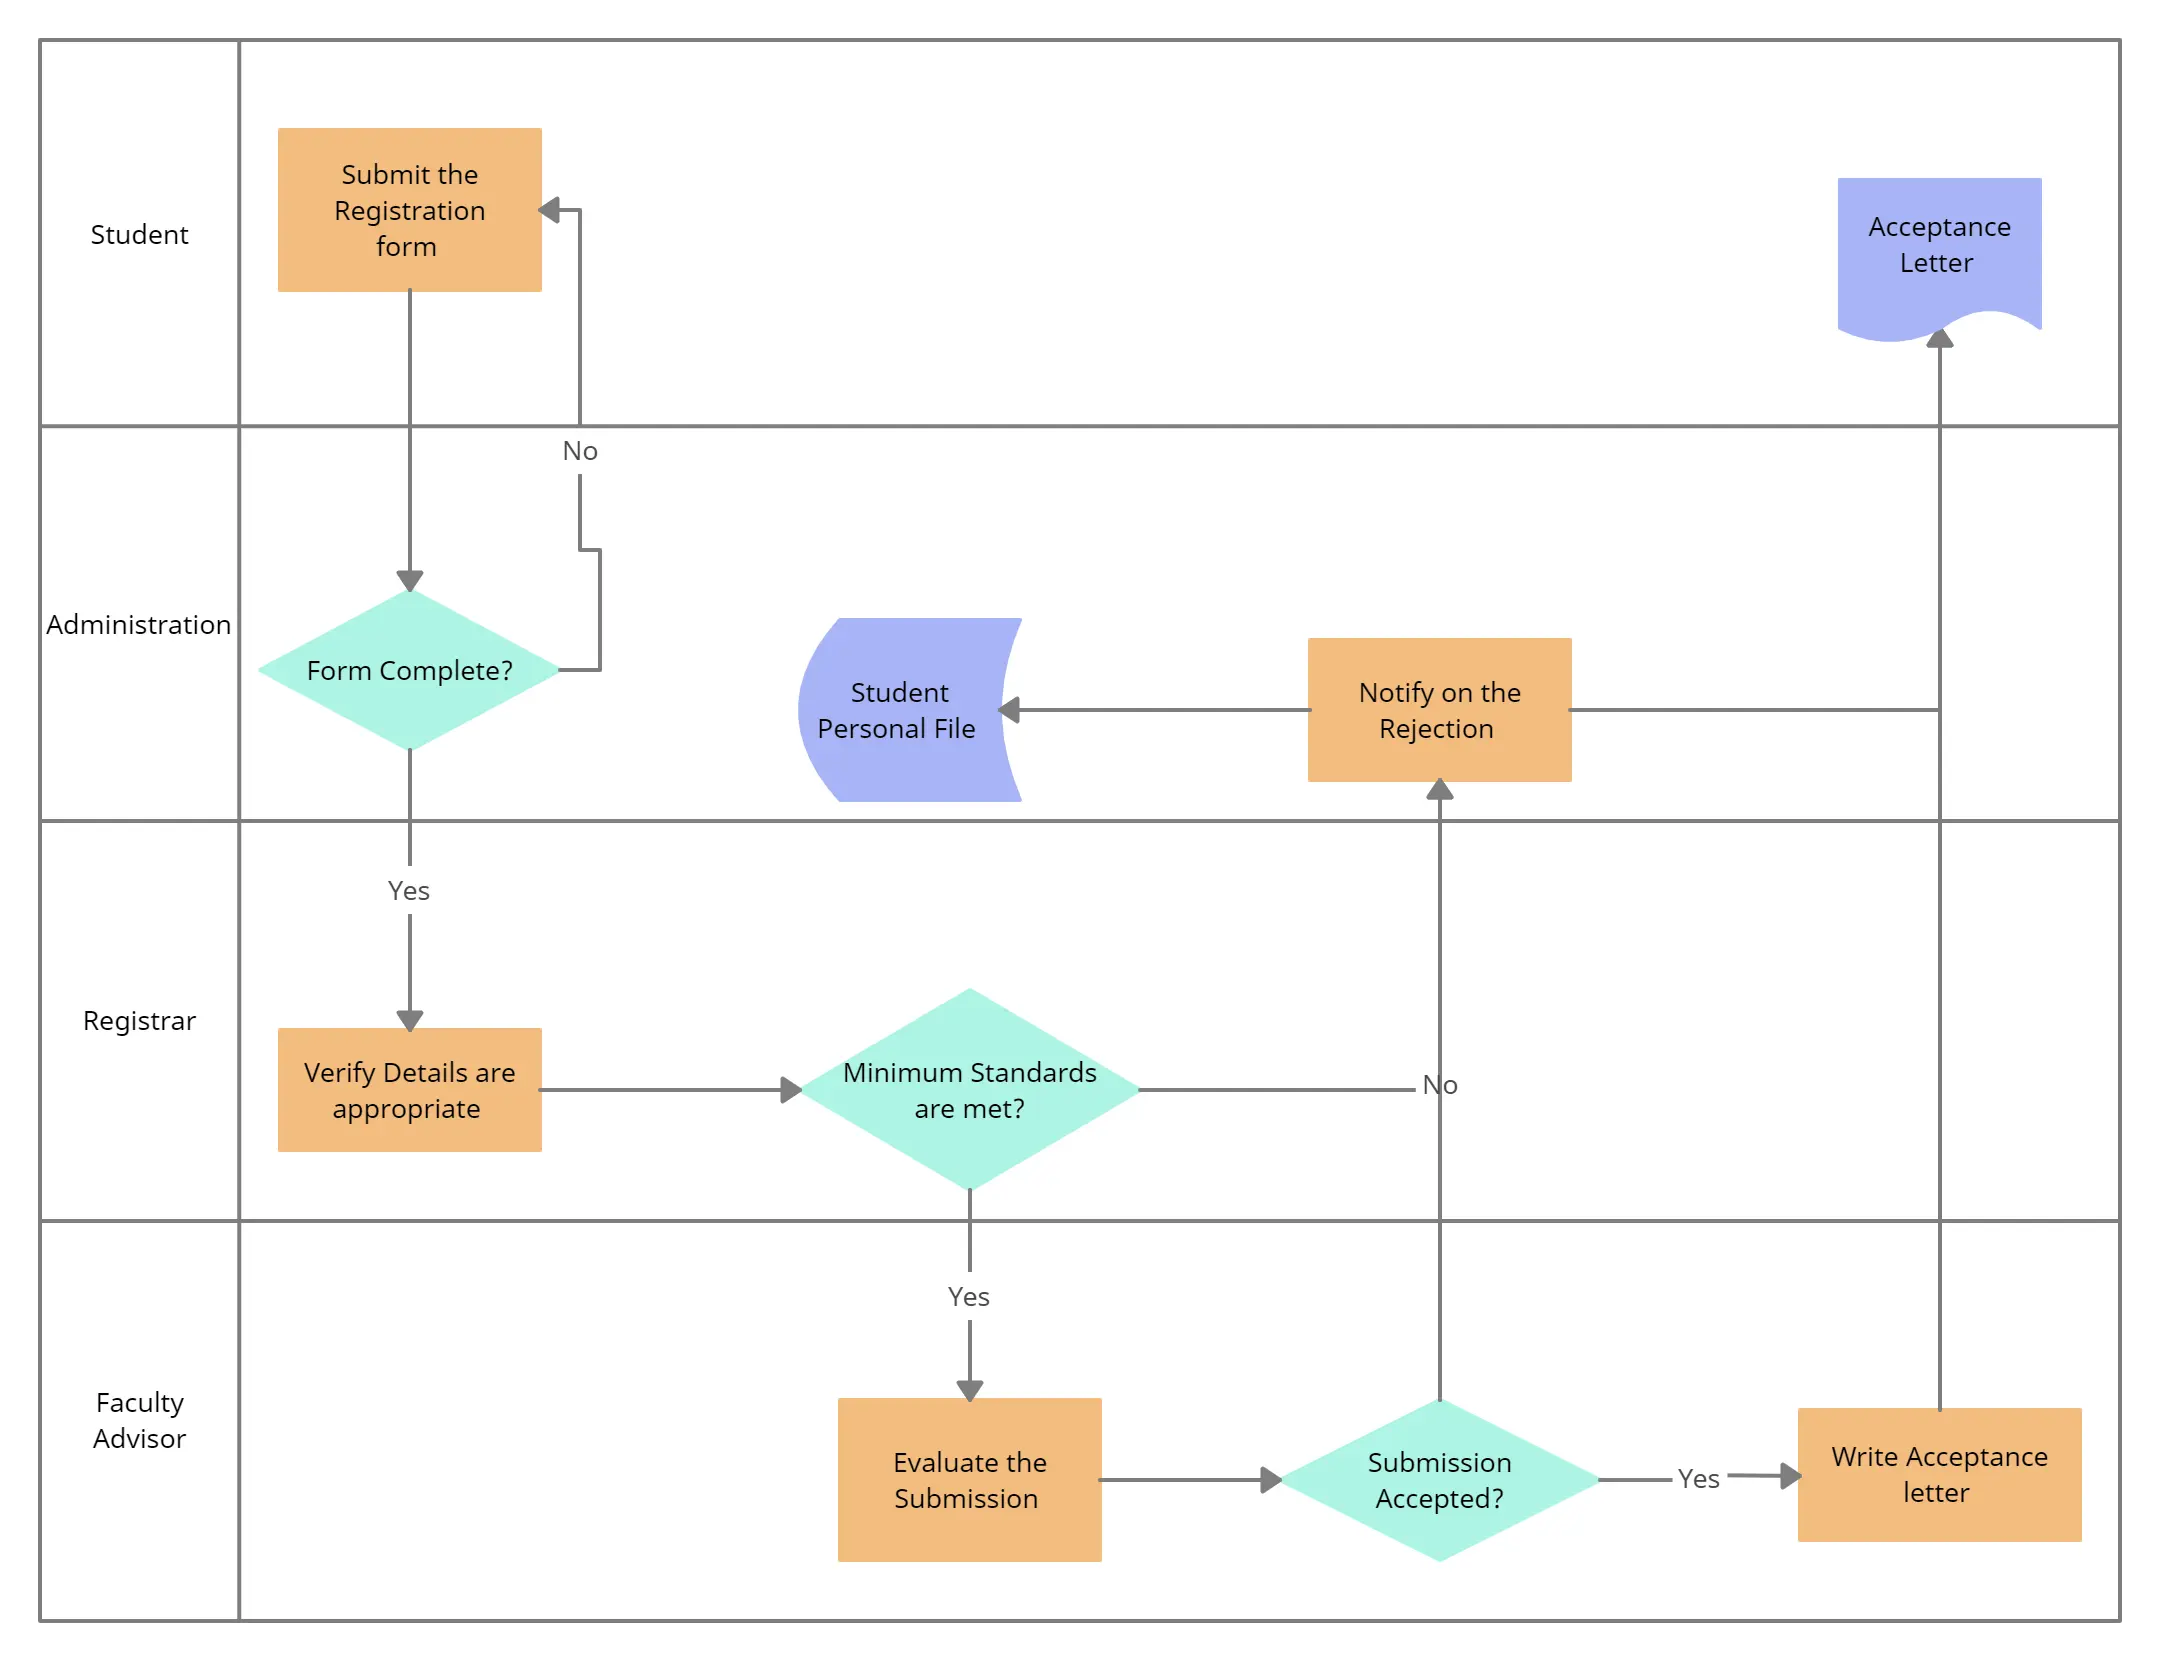
There are several types of flowcharts, including workflow diagrams, decision trees, and swimlane diagrams. Each type is suited to a specific purpose, so it's essential to choose the right one for your needs. For example, if you're trying to illustrate a complex workflow with multiple teams involved, a swimlane diagram might be the best choice. On the other hand, if you're trying to show a simple decision-making process, a basic flowchart might be sufficient.
4. Choose Your Symbols and Notations
Flowcharts use a variety of symbols and notations to represent different steps and decisions. These can include rectangles for steps, diamonds for decisions, and arrows to show the flow of the process. It's essential to use consistent symbols and notations throughout your flowchart to avoid confusion. You can use standard flowchart symbols or create your own, as long as you use them consistently.
5. Sketch Out Your Flowchart
With your steps, decisions, and symbols in mind, it's time to start sketching out your flowchart. You can use a piece of paper, a whiteboard, or a software tool to create your chart. Don't worry too much about the layout at this stage; just focus on getting all the steps and decisions down in the right order. You can refine the layout later.
6. Add Arrows and Connectors
Once you have all the steps and decisions in place, it's time to add arrows and connectors to show the flow of the process. Arrows should point from one step to the next, showing the direction of the flow. Connectors can be used to join multiple arrows together or to show where a decision leads to multiple possible outcomes.
7. Refine the Layout
With all the elements in place, it's time to refine the layout of your flowchart. This involves arranging the steps and decisions in a logical and visually appealing way. You may need to move elements around, adjust the size and shape of the symbols, or add additional connectors to make the flowchart easy to follow.
8. Add Labels and Annotations
Finally, add labels and annotations to your flowchart to provide additional context and information. This can include brief descriptions of each step, explanations of the decisions, or notes about the expected outcomes. Keep your labels and annotations concise and clear, as they should support the flowchart without overwhelming it.
9. Review and Test Your Flowchart
Before you consider your flowchart complete, review it carefully to ensure it's logical and easy to follow. Test it by walking through the process step by step, using the flowchart as a guide. Check for any errors, inconsistencies, or areas that are unclear. Make any necessary adjustments before finalizing your flowchart.
10. Share Your Flowchart
Once you're happy with your flowchart, it's time to share it with others. This could involve printing it out, saving it as a digital file, or presenting it in a meeting. Make sure your flowchart is clear and easy to understand, and be prepared to explain it to others. With these steps, you should be able to create a clear and effective flowchart that helps you communicate complex processes and decisions.
If you are looking for How to Make a Flowchart in Minutes? you've visit to the right web. We have 10 Pictures about How to Make a Flowchart in Minutes? like Zen Flowchart, Flowchart Tutorial (with Symbols, Guide And Examples), 45% OFF and also Flowchart Tutorial (with Symbols, Guide And Examples), 45% OFF. Read more:
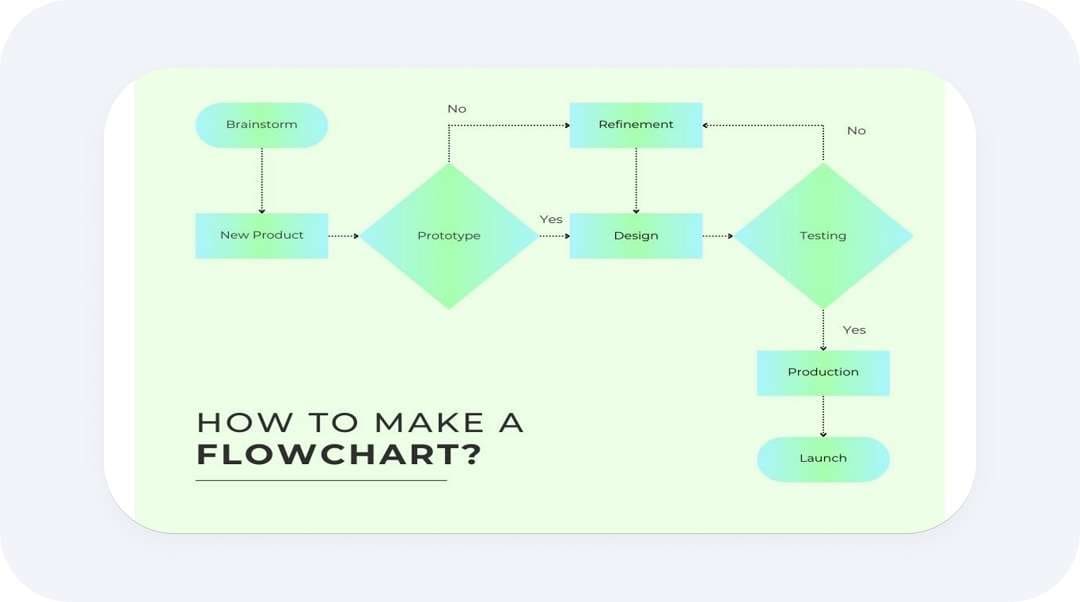
How To Make A Flowchart In Minutes?
 edrawmax.wondershare.com
How to Make a Flowchart in Minutes?
Zen Flowchart
 www.zenflowchart.com
Zen Flowchart
Kritika's Year 10 Blog!: Flowchart Basics
 kritikayr10.blogspot.com
Kritika's Year 10 blog!: Flowchart Basics
How To Make Flowchart In PPT
 flowchartai.org
How to Make Flowchart in PPT
Creating A Process Flowchart Easy-to-use Flowchart Maker - Flowchart
 flowchart.artourney.com
Creating A Process Flowchart Easy-to-use Flowchart Maker - Flowchart ...
Flowchart Or Process Flow Chart (VIDEO?), 49% OFF
 www.pinnaxis.com
Flowchart Or Process Flow Chart (VIDEO?), 49% OFF
Algorithm And Flowchart: Definitions, Symbols, Examples (2025)
 flowchartai.org
Algorithm and Flowchart: Definitions, Symbols, Examples (2025)
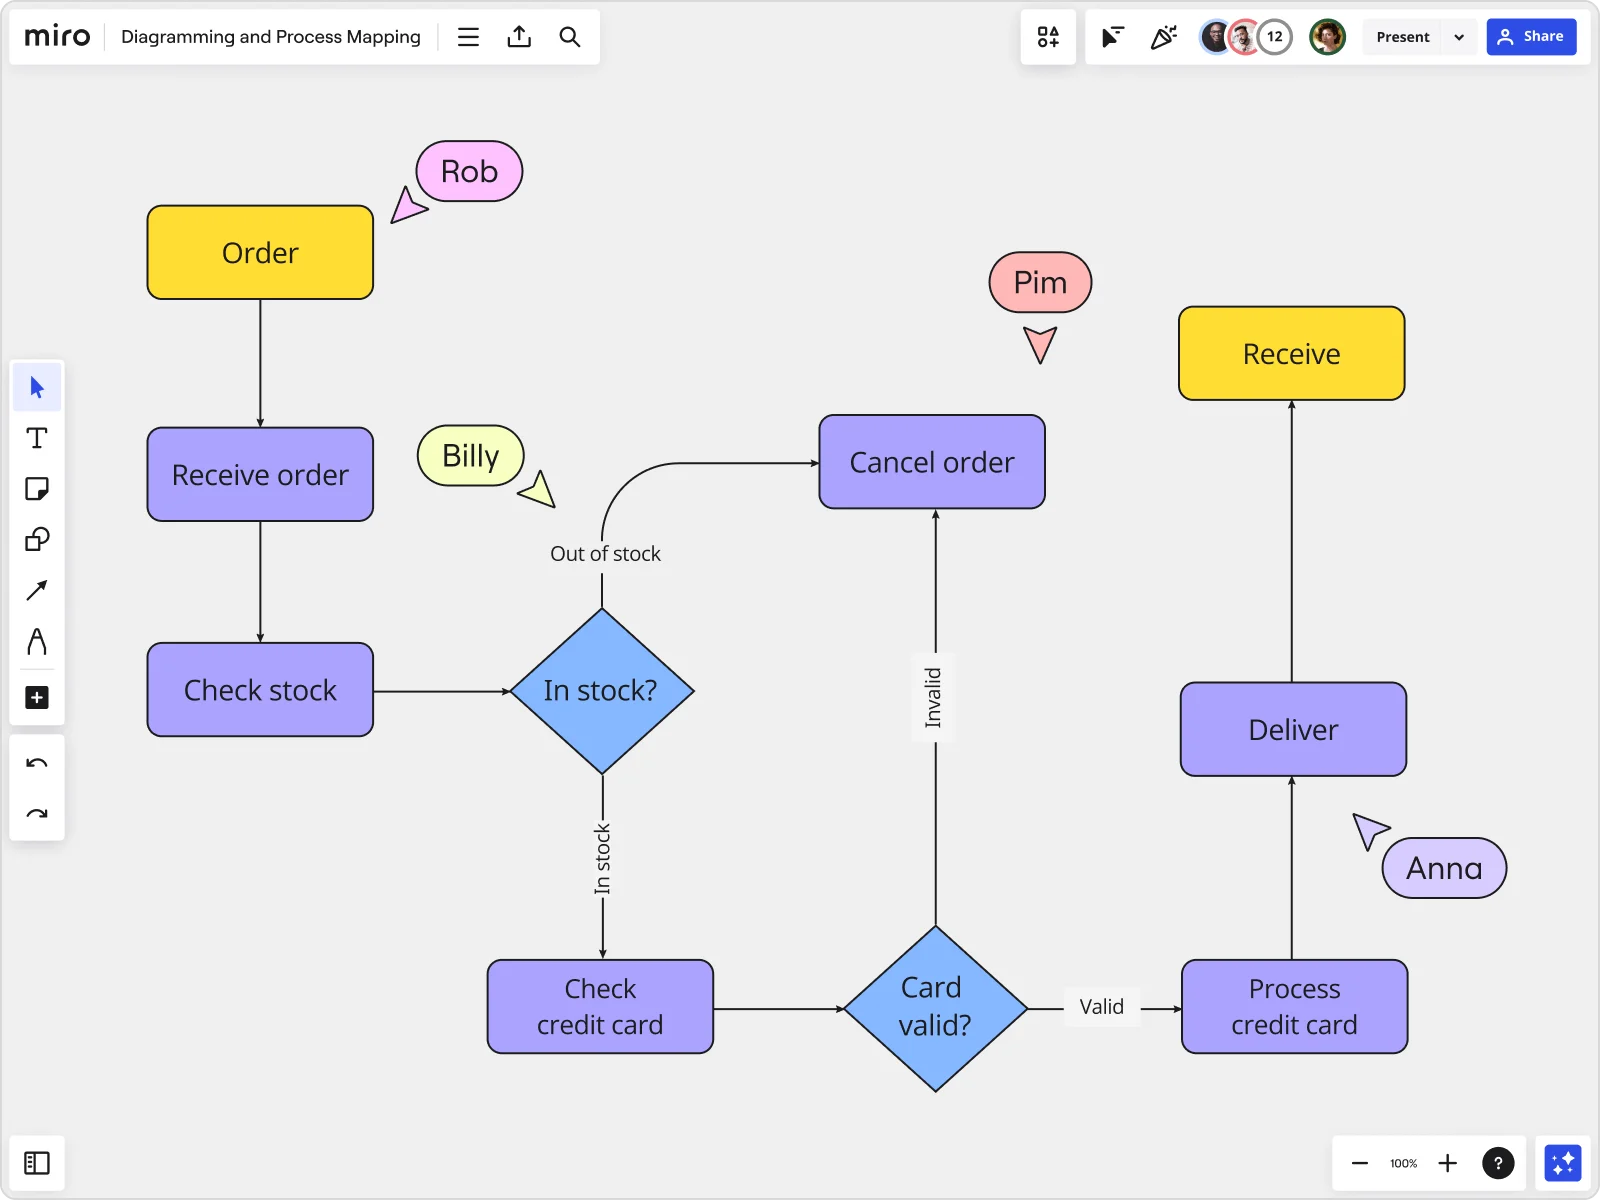
How To Make A Flowchart: A Simple Guide | Miro
 miro.com
How to Make a Flowchart: A Simple Guide | Miro
How To Make A Flowchart (with Examples + Templates)
 slidemodel.com
How to Make a Flowchart (with Examples + Templates)
Flowchart Tutorial (with Symbols, Guide And Examples), 45% OFF
 www.pinnaxis.com
Flowchart Tutorial (with Symbols, Guide And Examples), 45% OFF
Flowchart tutorial (with symbols, guide and examples), 45% off. Algorithm and flowchart: definitions, symbols, examples (2025). Kritika's year 10 blog!: flowchart basics

