Creating a flowchart in Microsoft Word can be a straightforward and efficient way to visualize processes, decision-making trees, and workflows. Whether you're a student working on a project, a professional aiming to improve office operations, or an entrepreneur seeking to streamline business processes, understanding how to make a flowchart in Word is a valuable skill. The process involves leveraging Word's built-in features and possibly some external tools to create clear, concise, and easy-to-understand diagrams. Here's a step-by-step guide on how to do it:
1. Open Microsoft Word and Start a New Document
To begin, you need to open Microsoft Word and create a new document. This gives you a blank canvas to work with, free from any pre-existing content that might interfere with your flowchart. Once the new document is open, you can proceed to decide on the size and layout of your page, depending on the complexity and scope of your flowchart.
2. Access the Shapes Tool
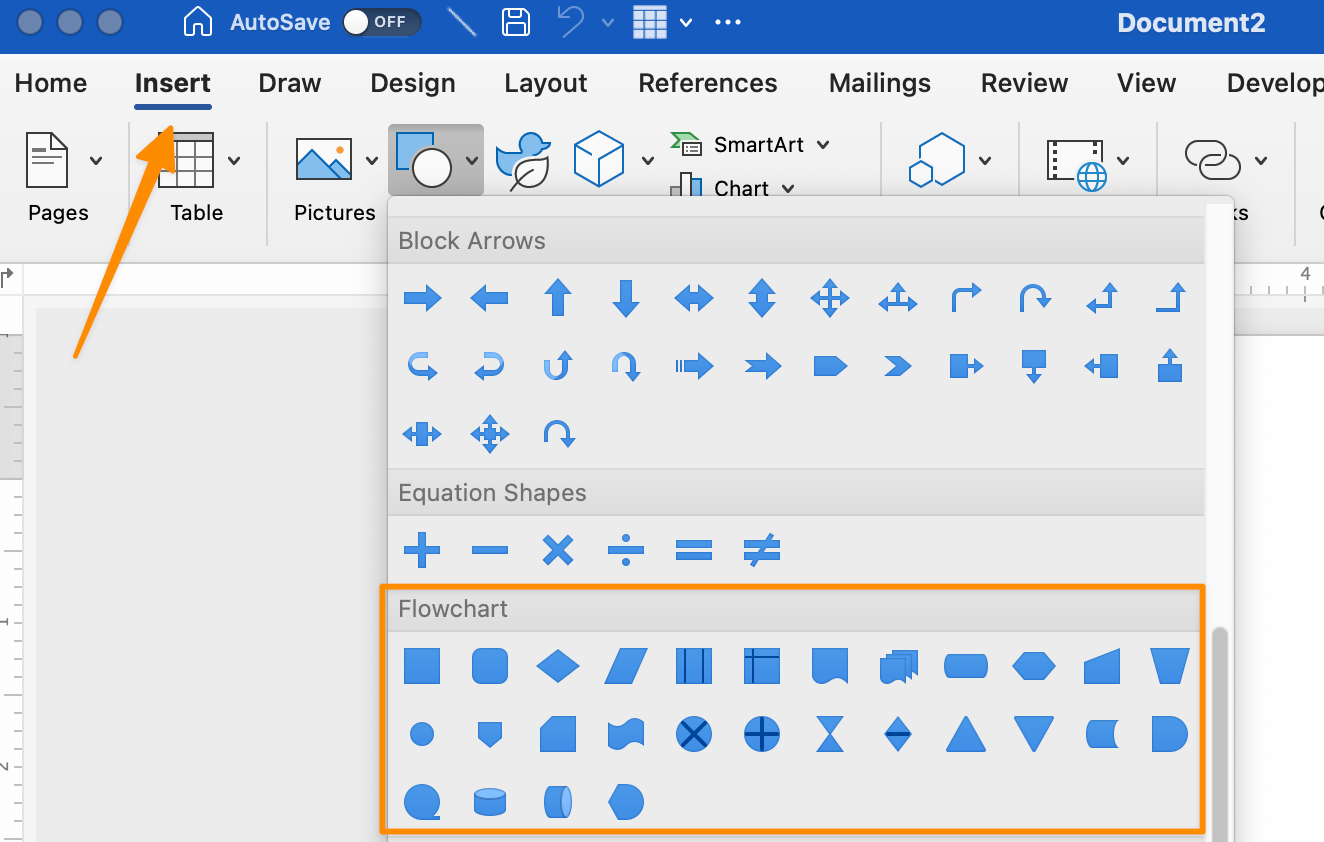
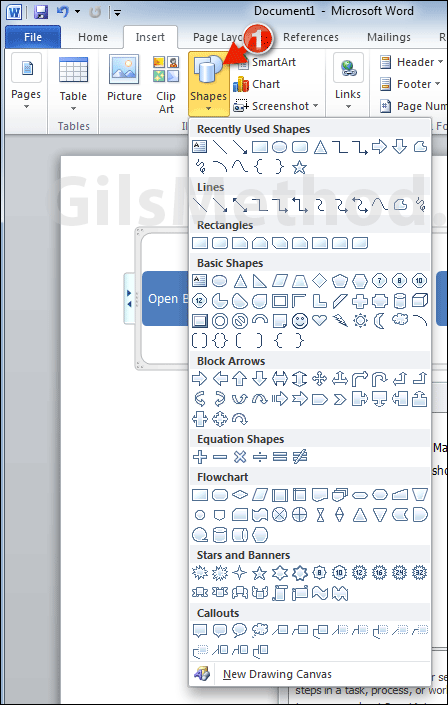
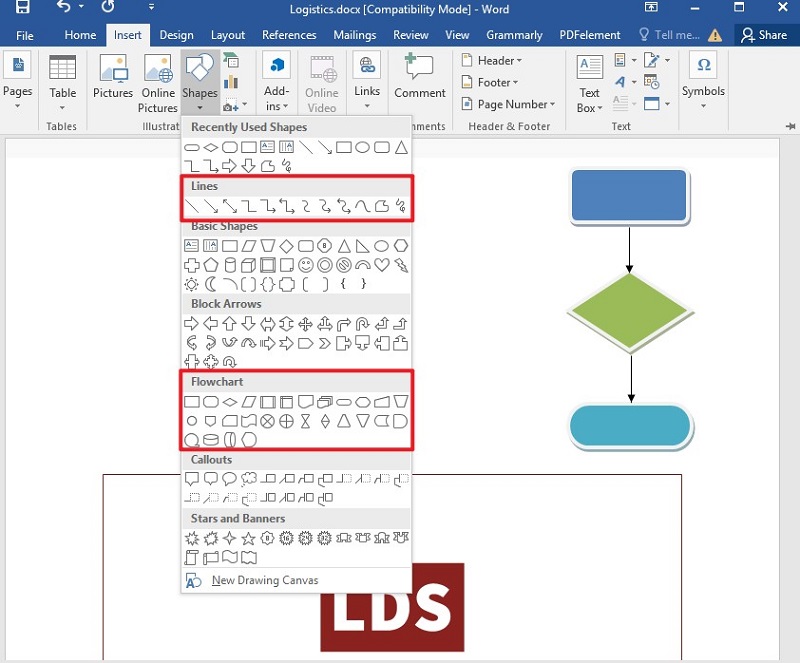
The next step involves accessing Word's shapes tool, which is fundamental for creating the various elements of your flowchart, such as rectangles, circles, and arrows. You can find the shapes tool in the 'Insert' tab of the ribbon. Clicking on 'Shapes' opens a dropdown menu with a variety of shapes to choose from. For flowcharts, you'll commonly use the 'Rectangle' for process boxes, 'Oval' for decision points, and 'Line' or 'Elbow Arrow' for connectors.
3. Draw the Basic Shapes
Using the shapes tool, start drawing the basic components of your flowchart. Begin with the starting point of your process, typically represented by an oval or a rectangle, depending on your preference or the convention you're following. Continue adding shapes as necessary to represent each step or decision in your process. Remember to leave enough space between shapes for clarity and to accommodate any text you might want to add.
4. Add Text to the Shapes
After drawing the shapes, you'll need to add text to them to describe what each step or decision entails. You can do this by clicking on the shape to select it, then typing your description inside. Word allows you to format the text (change font, size, color, etc.) to make it more readable or to highlight important information.
5. Connect the Shapes with Arrows
Once all the steps or decisions are represented by shapes and have their respective descriptions, it's time to connect them with arrows to show the flow of the process. Use the 'Line' or 'Elbow Arrow' from the shapes tool for this purpose. Word also allows you to change the style and direction of the arrows to better suit your flowchart's logic.
6. Format Your Flowchart for Readability
To ensure your flowchart is easy to understand, spend some time formatting it. This can involve aligning shapes, adjusting the size and color of shapes and text, and possibly adding a key or legend if you're using different colors or shapes to represent different types of actions or decisions.
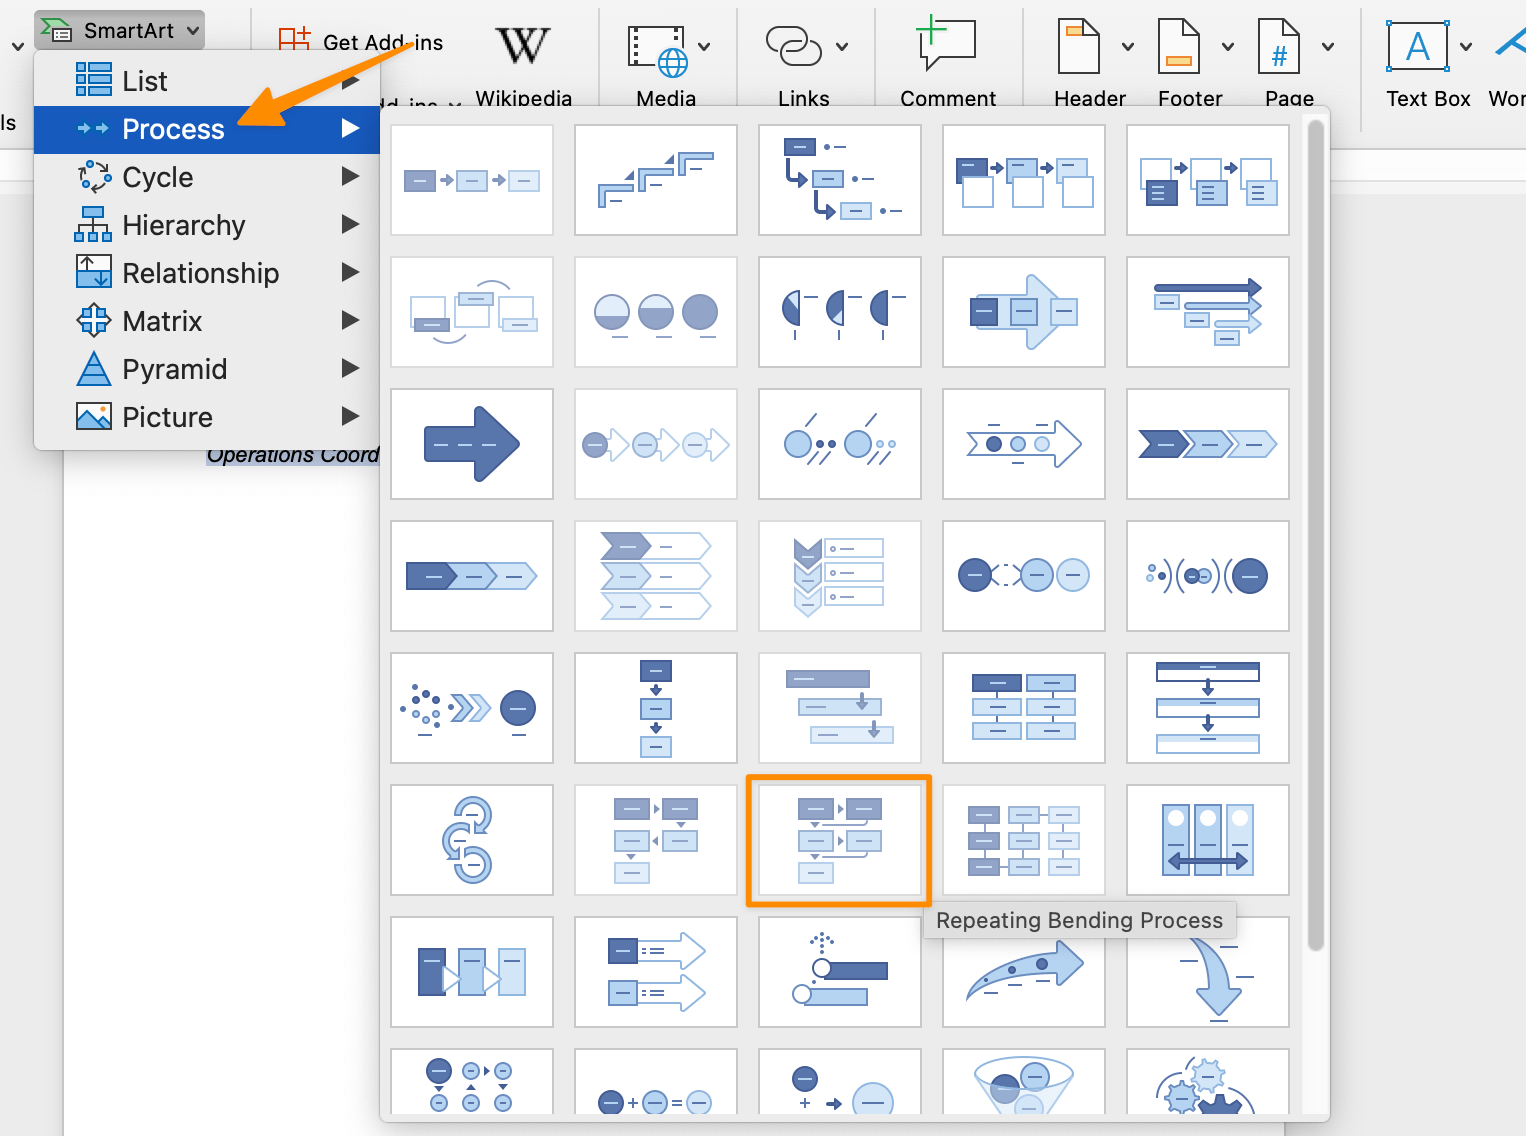
7. Use SmartArt for More Complex Flowcharts
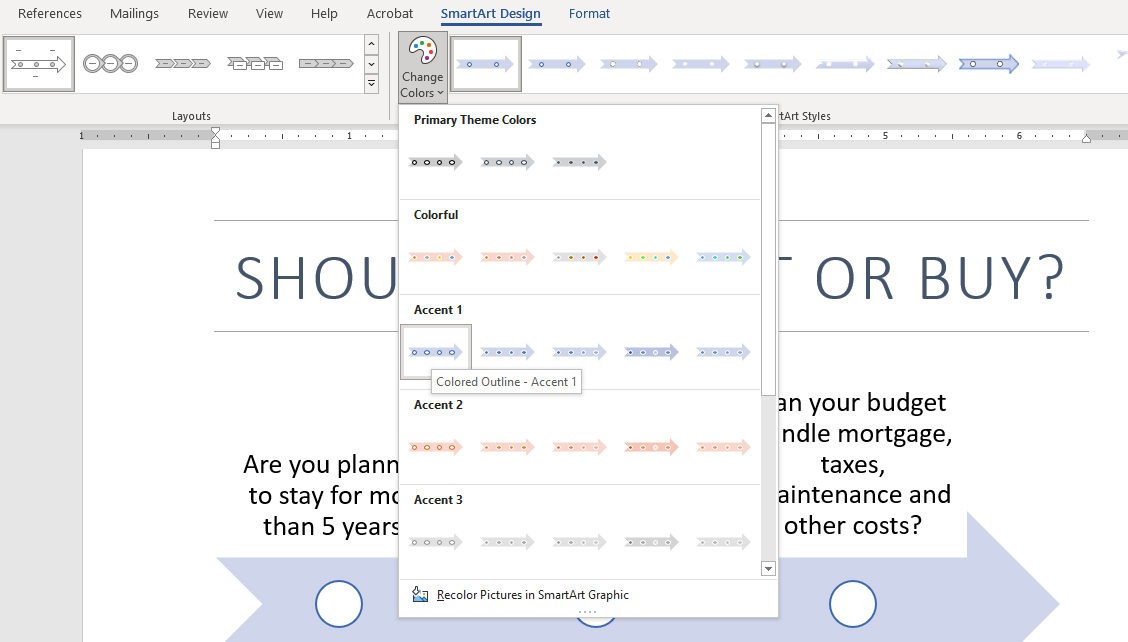
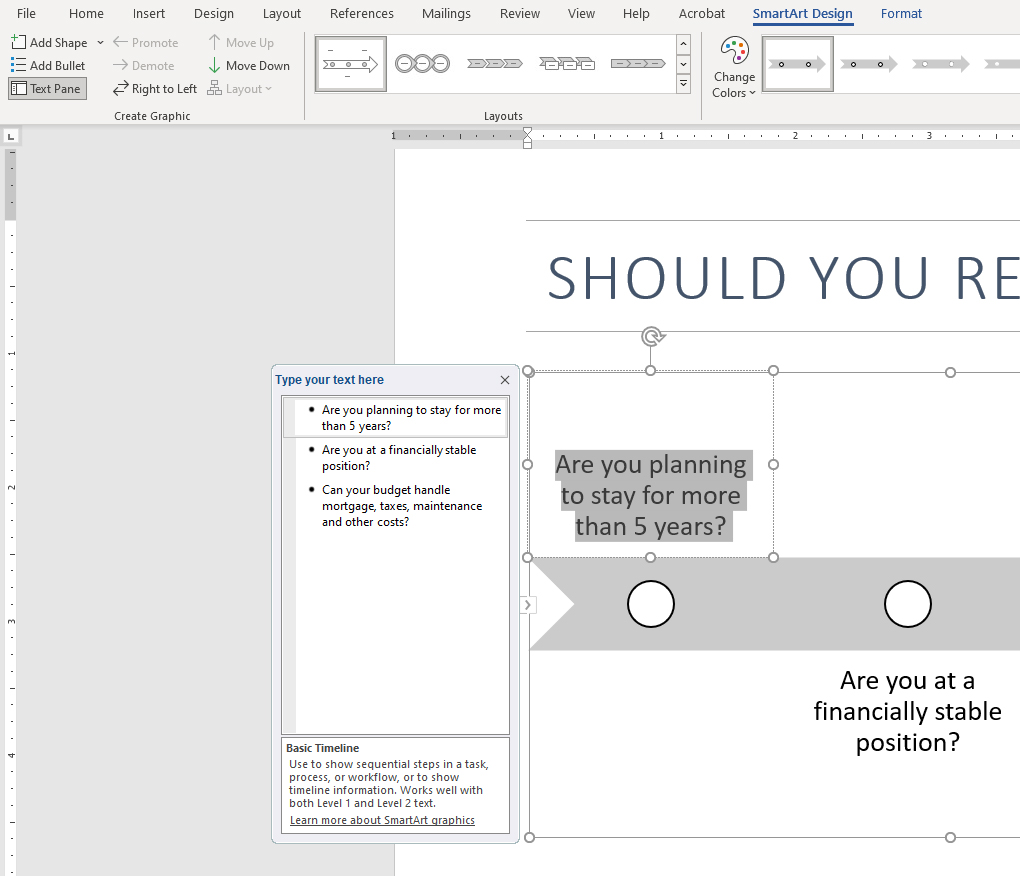
If your flowchart becomes too complex or if you prefer a more automated approach, consider using Word's SmartArt feature. Located in the 'Insert' tab, SmartArt offers pre-defined templates for flowcharts and other diagrams. You can choose a template close to your needs, add your text, and Word automatically adjusts the layout and appearance.
8. Add Additional Elements as Necessary
Depending on the nature of your flowchart, you might need to include additional elements such as conditional statements, loops, or even images. Word's extensive range of tools and features allows for a high degree of customization, enabling you to create a flowchart that perfectly represents the process or system you're illustrating.
9. Review and Edit Your Flowchart
Finally, review your flowchart to ensure it accurately represents the process or system you intended to illustrate. Check for any logical errors, inconsistencies in formatting, or areas where the flow could be improved. Editing at this stage can save time and effort in the long run, especially if your flowchart is intended for a presentation, report, or as a guide for others.
10. Save and Share Your Flowchart
Once you're satisfied with your flowchart, save it as a Word document (.docx) or export it in another format such as PDF, especially if you need to share it with others who might not have Word. Word's sharing and collaboration tools also allow you to invite others to edit your document or to leave comments, which can be particularly useful for team projects or collaborative work processes.
If you are searching about Flowchart In Word you've came to the right page. We have 10 Pictures about Flowchart In Word like Microsoft Word Flowchart How To Make A Flowchart In Word - Flowchart, Flowchart In Word and also 2 Methods to Make a Flowchart in Word. Read more:
Flowchart In Word
 utpaqp.edu.pe
Flowchart In Word
How To Make A Flowchart In Microsoft Word In 2026 - Venngage
 venngage.com
How to Make a Flowchart in Microsoft Word in 2026 - Venngage
How To Create Flowchart In Word
 flowchartai.org
How to Create Flowchart in Word
How To Create A Flowchart In Word
 gilsmethod.com
How to Create a Flowchart in Word
How To Make A Flowchart In Microsoft Word In 2026 - Venngage
 venngage.com
How to Make a Flowchart in Microsoft Word in 2026 - Venngage
How To Make A Flowchart In Microsoft Word In 2026 - Venngage
 venngage.com
How to Make a Flowchart in Microsoft Word in 2026 - Venngage
Creating Professional Flowcharts In Microsoft Word
 carreersupport.com
Creating Professional Flowcharts in Microsoft Word
How To Make A Flowchart In Microsoft Word In 2026 - Venngage
 venngage.com
How to Make a Flowchart in Microsoft Word in 2026 - Venngage
Microsoft Word Flowchart How To Make A Flowchart In Word - Flowchart
:max_bytes(150000):strip_icc()/21_how-to-create-a-microsoft-word-flowchart-4691348-614fc7512428443da98e3769e52f3ecb.jpg) flowchart.artourney.com
flowchart.artourney.com
Microsoft Word Flowchart How To Make A Flowchart In Word - Flowchart ...
2 Methods To Make A Flowchart In Word
 pdf.wondershare.com
2 Methods to Make a Flowchart in Word
How to create flowchart in word. how to make a flowchart in microsoft word in 2026. Microsoft word flowchart how to make a flowchart in word

