Creating a flowchart in Microsoft Word can be a straightforward process, especially when you know the right steps to follow. Whether you're working on a project, creating a presentation, or simply need to visualize your ideas, a flowchart can help you get your point across. In this article, we'll guide you through the process of creating a flowchart in Word, highlighting the key elements and tools you need to know.
1. Open Microsoft Word and Start a New Document
To begin, open Microsoft Word and start a new document. You can do this by clicking on the "File" tab and selecting "New" from the dropdown menu. This will give you a blank canvas to work with, where you can create your flowchart from scratch. Make sure to save your document regularly as you work, so you don't lose any of your progress.
2. Access the Shapes Tool
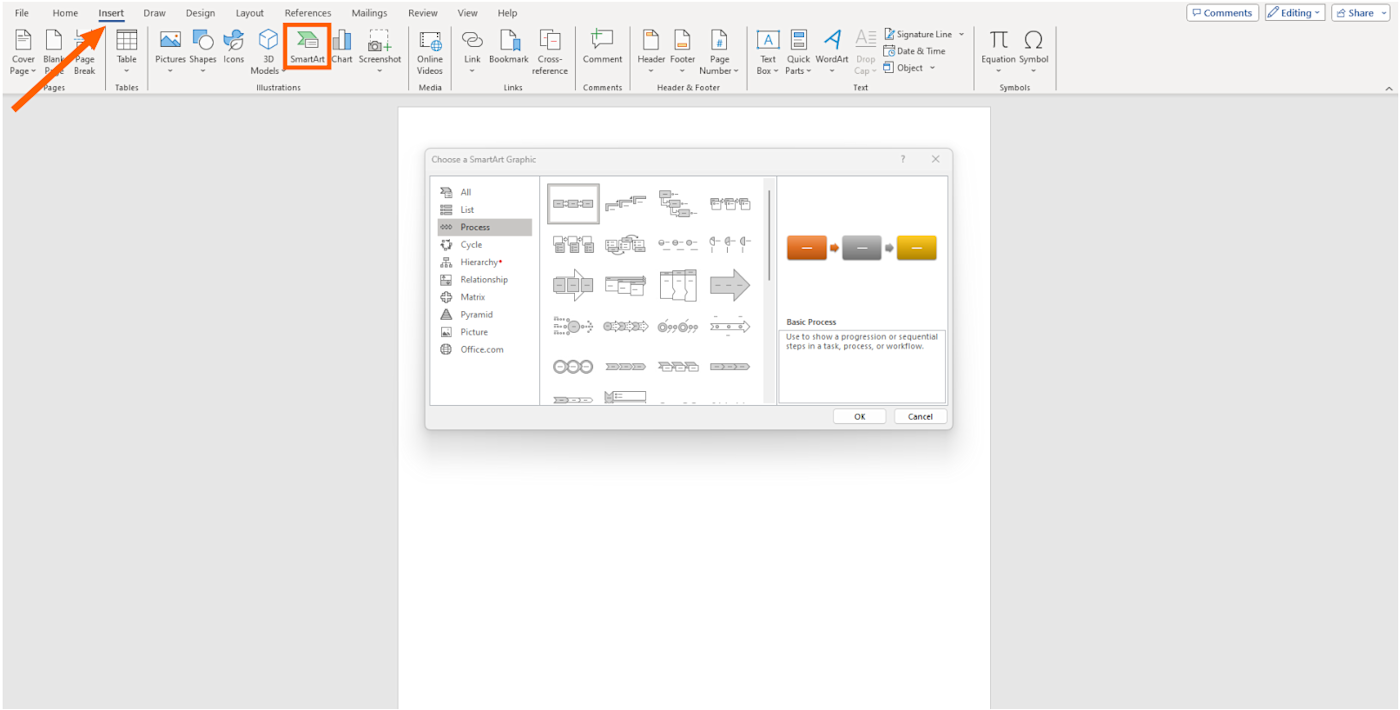
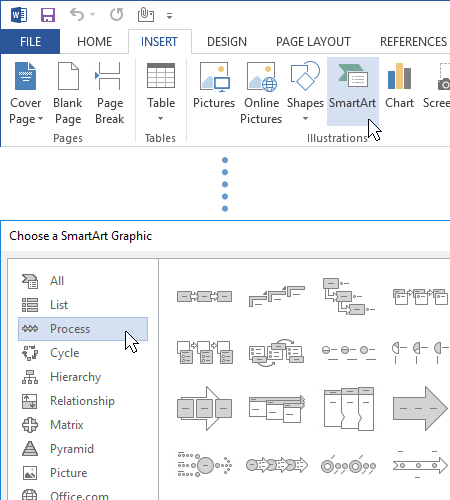
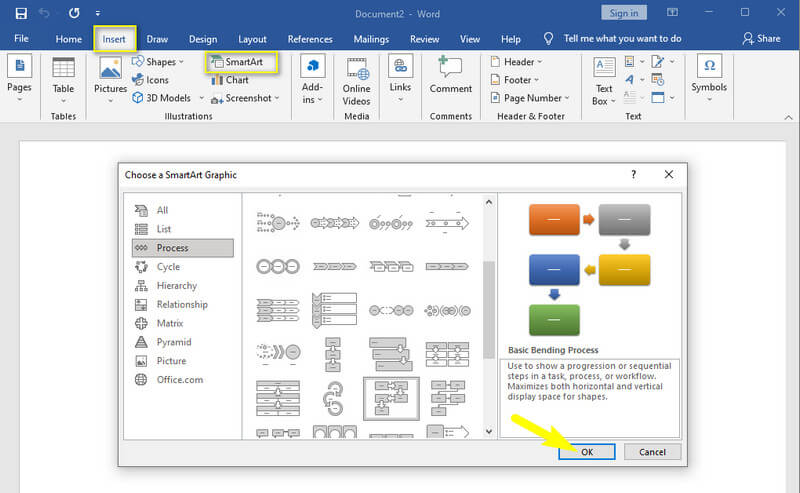
The Shapes tool is where you'll find all the different shapes and symbols you need to create your flowchart. To access the Shapes tool, click on the "Insert" tab and select "Shapes" from the illustrations group. This will open up a dropdown menu with a variety of shapes to choose from, including rectangles, arrows, and more.
3. Choose Your Flowchart Shapes
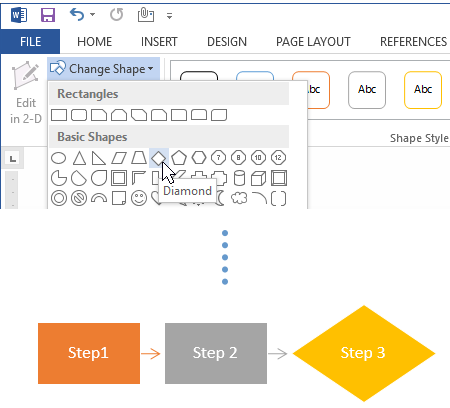
Flowcharts typically use a specific set of shapes to represent different stages or decisions. These shapes include rectangles, diamonds, circles, and arrows. Rectangles are usually used to represent processes, diamonds are used for decisions, and circles are used to represent the start or end of a process. Arrows are used to connect the different shapes and show the flow of the process.
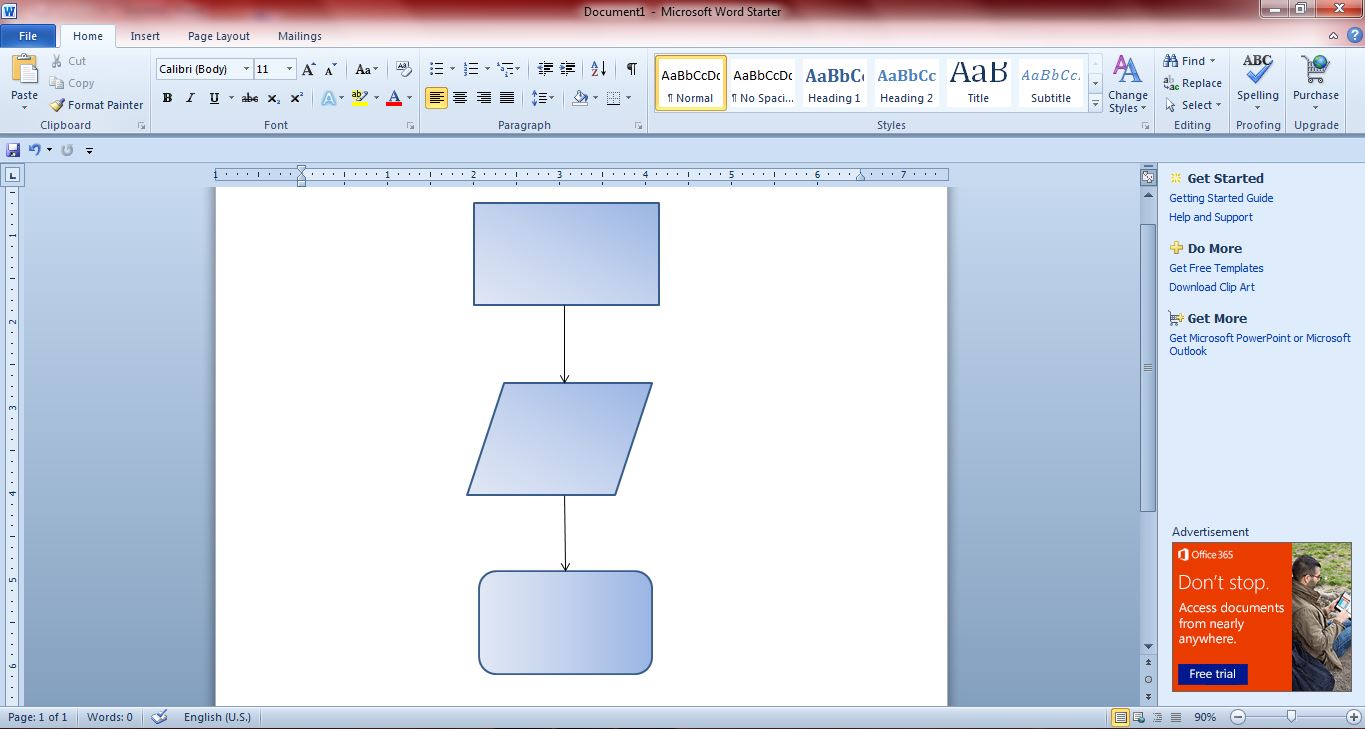
4. Draw Your Flowchart
Once you've selected your shapes, you can start drawing your flowchart. Click and drag the shape to the location where you want it to appear on the page. You can resize the shape by dragging the corners, and you can rotate it by using the rotation handle. To add text to your shape, simply click on the shape and start typing.
5. Add Arrows to Connect Your Shapes
Arrows are used to connect the different shapes in your flowchart and show the flow of the process. To add an arrow, click on the "Insert" tab and select "Shapes" from the illustrations group. Then, select the arrow shape and click and drag it to the location where you want it to appear. You can adjust the length and direction of the arrow by dragging the endpoints.
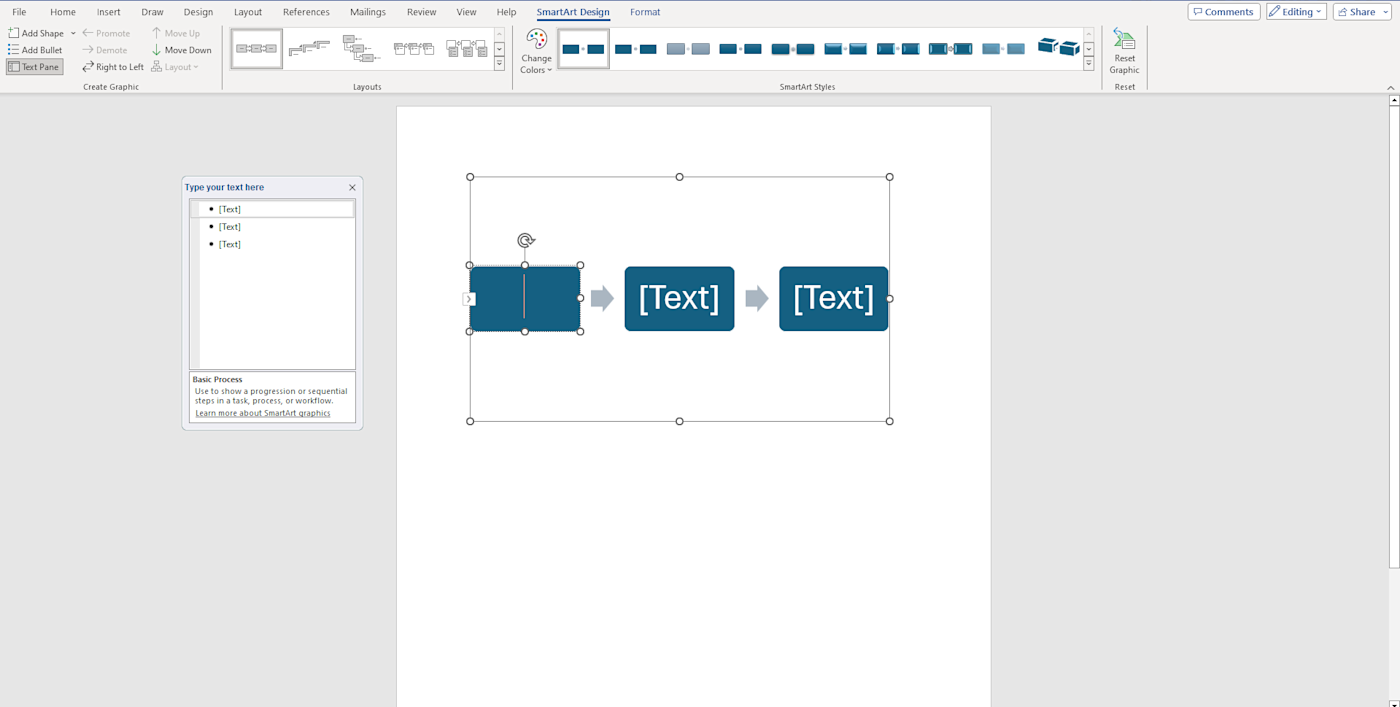
6. Use the Smart Panel to Adjust Your Shapes
The Smart Panel is a handy tool that allows you to adjust the layout and appearance of your shapes. To access the Smart Panel, select the shape you want to adjust and click on the "Format" tab. From here, you can adjust the shape's size, color, and alignment, as well as add effects such as shadows and glows.
7. Add Text to Your Shapes
To add text to your shapes, simply click on the shape and start typing. You can adjust the font, size, and color of the text using the tools on the "Home" tab. You can also use the "Format" tab to adjust the text's alignment and orientation.
8. Use the Grid to Align Your Shapes
The grid is a useful tool that helps you align your shapes and keep your flowchart organized. To turn on the grid, click on the "View" tab and select "Gridlines" from the show group. From here, you can adjust the grid's spacing and alignment to suit your needs.
9. Save Your Flowchart as a Template
Once you've created your flowchart, you can save it as a template for future use. To do this, click on the "File" tab and select "Save As" from the dropdown menu. Then, select "Word Template" from the save as type dropdown menu and give your template a name. This will allow you to easily access and modify your flowchart in the future.
10. Export Your Flowchart as an Image
Finally, you can export your flowchart as an image to use in other documents or presentations. To do this, click on the "File" tab and select "Save As" from the dropdown menu. Then, select "JPEG" or "PNG" from the save as type dropdown menu and give your image a name. This will allow you to easily share your flowchart with others or use it in other contexts.
If you are looking for How to make a flowchart in Microsoft Word | Zapier you've came to the right page. We have 10 Pics about How to make a flowchart in Microsoft Word | Zapier like Flowchart In Ms Word Flowchart Smartart Digitally - Flowchart Example, How to make a flowchart in Microsoft Word | Zapier and also How to Make a Flowchart in Word - Create Flow Charts in Word with. Here you go:
How To Make A Flowchart In Microsoft Word | Zapier
 zapier.com
How to make a flowchart in Microsoft Word | Zapier
How To Make A Flowchart In Microsoft Word [Diagram Guide]
![How to Make a Flowchart in Microsoft Word [Diagram Guide]](https://10pcg.com/wp-content/uploads/customize-flowchart-shape-styles-in-word.jpg) 10pcg.com
10pcg.com
How to Make a Flowchart in Microsoft Word [Diagram Guide]
How To Make A Flowchart In Microsoft Word | Zapier
 zapier.com
How to make a flowchart in Microsoft Word | Zapier
How To Make A Flowchart In Microsoft Word | Zapier
 zapier.com
How to make a flowchart in Microsoft Word | Zapier
How To Create A Microsoft Word Flowchart
:max_bytes(150000):strip_icc()/019-how-to-create-a-microsoft-word-flowchart-ff53bee3d5254431bc6e67cf41615345.jpg) www.lifewire.com
www.lifewire.com
How to Create a Microsoft Word Flowchart
How To Make A Flowchart In Microsoft Word | Zapier
 zapier.com
How to make a flowchart in Microsoft Word | Zapier
Flowchart In Ms Word Flowchart Smartart Digitally - Flowchart Example
 flowchart.artourney.com
Flowchart In Ms Word Flowchart Smartart Digitally - Flowchart Example
How To Make A Flowchart In Word - Create Flow Charts In Word With
 www.smartdraw.com
How to Make a Flowchart in Word - Create Flow Charts in Word with ...
How To Make A Flowchart In Word - Create Flow Charts In Word With
 www.smartdraw.com
How to Make a Flowchart in Word - Create Flow Charts in Word with ...
En Genomgångsguide För Att Skapa Ett Flödesschema I Word
 www.mindonmap.com
En genomgångsguide för att skapa ett flödesschema i Word
How to make a flowchart in microsoft word. flowchart in ms word flowchart smartart digitally. How to make a flowchart in microsoft word

